
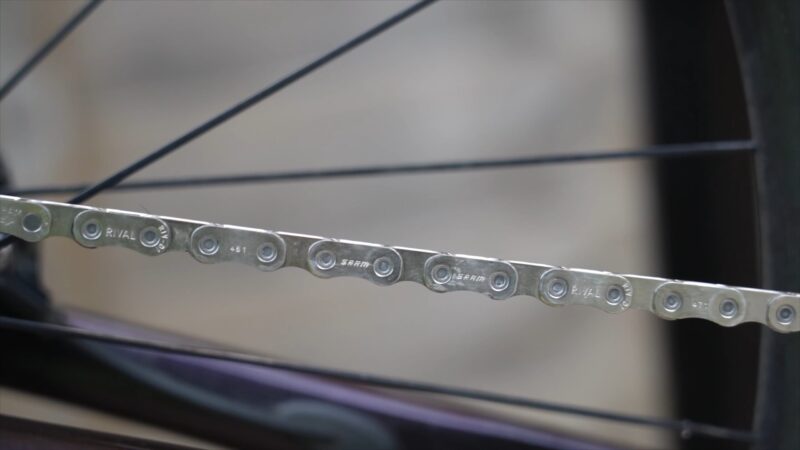
In the world of machinery and cycling, chains play a pivotal role, ensuring that systems run smoothly and efficiently. But like all components, chains wear out, get damaged, or sometimes need adjustments.
Enter the chain breaker—a tool that, while simple in appearance, can be daunting for many to use. Whether you’re a seasoned mechanic looking to refresh your skills or a beginner trying to navigate the intricacies of chain maintenance, this tutorial is for you.
What do you need to know about this tool?
A chain breaker is a specialized tool designed to remove and replace the pins that hold a chain’s links together. Whether you’re a seasoned mechanic or a newbie, understanding the tool is the first step to using it effectively.
Its Anatomy
The chain breaker might seem like a simple tool, but its design is the result of careful engineering to ensure it can handle the rigors of chain maintenance.
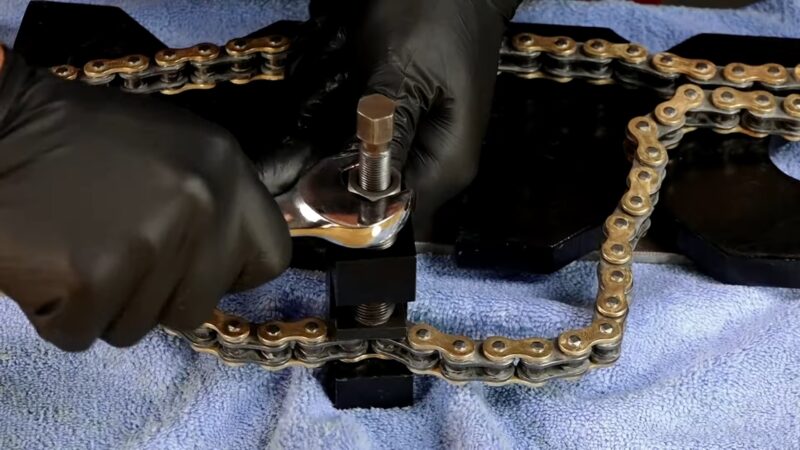
- Handle: This is where you grip the tool. It’s typically long to provide leverage when pushing out the chain pin.
- Screw or Pin Pusher: This is the part of the tool that pushes the chain pin out. It’s threaded and is turned by the handle.
- Chain Cradle: This is where the chain sits during the process. It ensures the chain is aligned correctly with the pin pusher.
Types of Chain Breakers
While the basic function remains the same, there are different types of chain breakers tailored for various chains and purposes.
| Chain Breaker Type | Description | Chain Compatibility | Portability/Compactness | Precision |
|---|---|---|---|---|
| Bicycle Chain Breakers | Specifically designed for thinner bicycle chains. Compact and portable. | Bicycle chains | High | Specialized |
| Motorcycle Chain Breakers | More robust design for thicker motorcycle chains. | Motorcycle chains | Moderate | Specialized |
| Universal Chain Breakers | Adjustable tool for various chain sizes. Versatile but potentially less precise. | Various chain sizes | Moderate | Adjustable |
Preparing Your Chain for Maintenance
Before diving into the process of using this tool, it’s crucial to prepare your chain. This ensures safety and efficiency during the procedure.
How to Clean It?
A clean chain is easier to work on and allows for better inspection of any potential issues.
- Degreasing: Use a commercial degreaser or a homemade solution (like a mix of dish soap and water) to remove old lubricant and grime. Apply the solution, scrub with a brush, and rinse.
- Drying: After cleaning, it’s essential to dry the chain thoroughly. This prevents rust and ensures a smooth operation when using the chain breaker.
Inspect the Chain!
Before breaking the chain, inspect it to determine the best link to work on and to identify any potential issues.
Check for Damaged Links
Look for any links that are bent, twisted, or otherwise damaged. These are typically the best candidates for removal.
Identifying the Master Link
Some chains have a master link, which is a link designed for easy removal. If your chain has one, it’s often the best place to start.
The Step-by-Step Process of Using a Chain Breaker
Now that you’re familiar with the tool and have prepared your chain, it’s time to start the process.
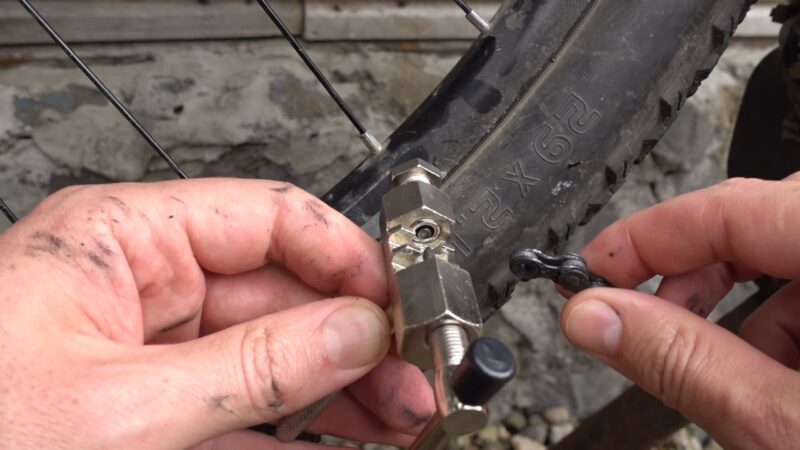
Step 1 – Positioning the Chain
Properly positioning the chain in the chain breaker is crucial for a smooth operation.
Step 2- Aligning
Place the chain in the chain cradle, ensuring that the pin you want to push out is aligned with the pin pusher of the tool.
Step 3 – Securing
Some chain breakers have a clamp or other mechanism to hold the chain in place. If yours does, ensure the chain is securely held but not overly tight.
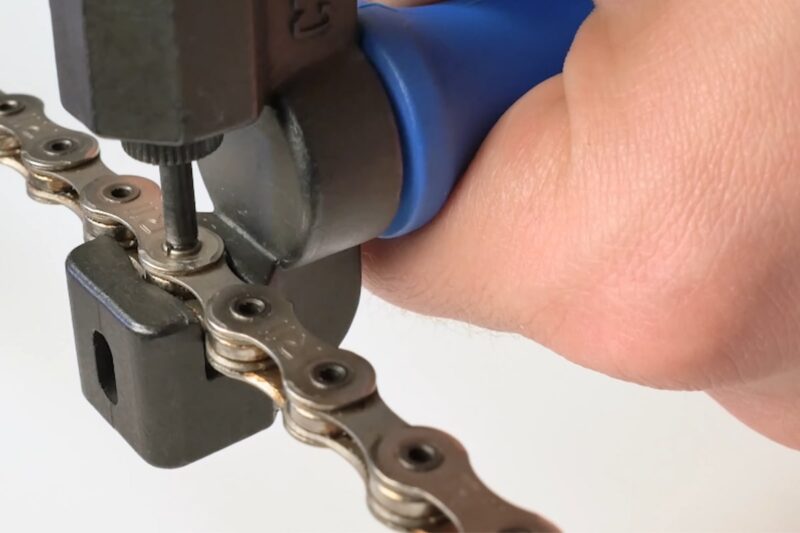
Step 4 – Pushing Out the Pin
This is the main event – using the tool to push out the pin and break the chain. Begin turning the handle, which will move the pin pusher towards the chain pin. Apply steady pressure, ensuring you’re pushing the pin straight out.
As you turn the handle, the chain pin will start to move out of the link. Continue turning until the pin is almost entirely out, but not fully removed. This makes it easier to reassemble the chain later.
Step 5 – Remove the Chain
With the pin partially pushed out, carefully remove the chain from the tool’s cradle. Make sure to keep track of the chain links and maintain their order if you plan to reassemble the chain.
Step 6 – Reassembly (if needed)
If you’re replacing a damaged link or performing maintenance, now is the time to insert a new link or reattach the chain. Align the ends of the chain and insert the replacement link’s pin into the hole of the chain link.
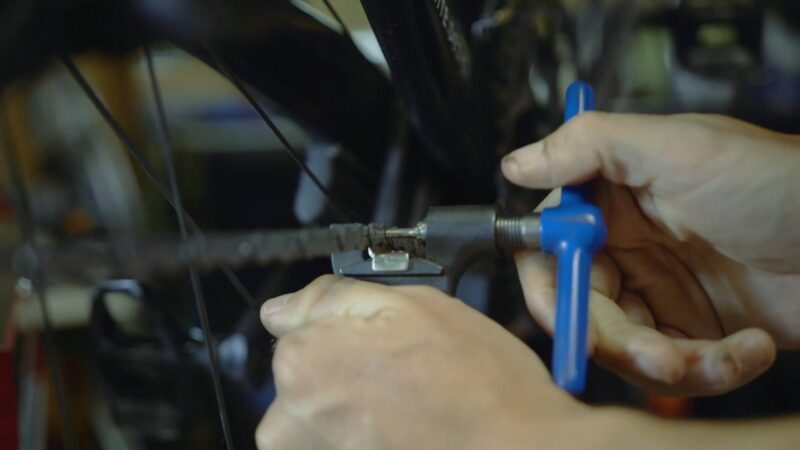
Push the Pin Back In
Place the chain back into the tool’s cradle, aligning the pin hole with the pin pusher. Slowly turn the handle in the opposite direction to push the pin back into place. Make sure the pin is flush with the chain link on both sides.
Step 7 – Testing and Lubrication
After reassembly, give the chain a gentle tug to ensure the link is securely in place. If everything looks good, apply a lubricant suitable for your chain type to ensure smooth operation.
Step 8 – Repeat as Needed
If you’re working on a longer chain, repeat the process for each link you need to remove or replace.
Step 9- Final Check
Inspect the chain again to ensure all links are properly aligned, and there are no issues. Ensure the chain moves freely and smoothly.
Common Issues
Even with the best preparation, you might encounter some challenges.
The Pin Won’t Budge
Sometimes, the chain pin might be stubborn and refuse to move. Apply a few drops of penetrating oil to the pin and let it sit for a few minutes. This can help loosen any rust or grime that’s causing the pin to stick.
If lubrication doesn’t help, you might need to apply more force. Ensure the chain is properly aligned in the tool and turn the handle with more pressure.
Chain Breaker Slipping
If the tool keeps slipping off the chain or isn’t holding it securely:
- Check the Chain Cradle: Ensure the chain is properly seated in the chain cradle. If the tool has a clamp, ensure it’s securely holding the chain.
- Inspect the Chain Breaker: The tool itself might be worn out or damaged. Check the pin pusher for any signs of wear or bending.
How to Maintain Your Tool?
To ensure your chain breaker serves you well for years to come, regular maintenance is essential. After each use, it’s a good idea to clean it. Use a clean cloth to wipe it down, removing any grease or grime.
Inspect the tool for any signs of wear, especially the pin pusher. If it’s bent or damaged, it might be time for a replacement.
Storing Properly
Proper storage can extend the life of your chain breaker. Always store it in a dry place to prevent rust.
Protective Case
If your tool came with a case, always store it inside. If not, consider getting a protective pouch or case to keep it safe from damage.
Safety Measures
Safety is paramount when working with tools like chain breakers. Pay attention to the following:
| Safety Measure | Description |
|---|---|
| Wear Protective Gear | Wear safety goggles, gloves, and appropriate protective equipment to guard against debris, sharp edges, and chemicals. |
| Work in a Well-Ventilated Area | Operate in a space with proper ventilation, especially if using cleaning agents or lubricants. |
| Steady Work Surface | Use a stable, flat surface to prevent tool or chain movement during operation. |
| Secure the Chain | Ensure the chain is firmly held in place to prevent unexpected movements. |
| Use Proper Technique | Follow instructions carefully, apply controlled pressure, and avoid excessive force. |
| Protect Your Hands | Keep hands clear of moving parts and pin pusher’s path. |
| Inspect Tools | Check the tool for defects or damage before use. |
| Lighting | Work in a well-lit area for clear visibility. |
| Avoid Overexertion | If encountering resistance, stop and reassess instead of using excessive force. |
| Proper Disposal | Dispose of chemicals according to regulations. |
| Proper Lubrication | Apply lubricant carefully to prevent oversaturation. |
| Keep Others Away | Inform others and maintain a safe distance if working in a shared space. |
| Educate Yourself | Learn from experienced individuals or resources before attempting if you’re new to using a chain breaker. |
FAQs:
How often should I replace my chain breaker’s pin?
Replace the pin if it becomes bent, dull, or shows signs of wear.
Can I use a chain breaker on rusted chains?
It’s possible, but a rusted chain might require more force and can be more prone to damage.
Is it possible to break a chain without it?
While there are alternative methods, using a tool is the safest and most efficient way.
How long does this tool last?
With proper maintenance, a quality chain breaker can last for many years.
Can I use it on all types of chains?
No, always ensure the chain breaker is compatible with the specific type and size of your chain.
Conclusion
Using a chain breaker might seem daunting at first, but with practice and attention to detail, it becomes a valuable skill for repairing and replacing chains on bicycles, motorcycles, or other equipment.
By following this step-by-step guide, you’ll be able to confidently use this tool and keep your chains in top condition.
Remember, safety is crucial when working with tools, so always wear appropriate protective gear and work in a well-lit and well-ventilated area.